
DIY Dry Ice Bubble Bowl Activity
Are you on the lookout for a fun, easy-to-clean activity that your kids will love? Look no further. Not only is this DIY Dry Ice Bubble Bowl Activity family-friendly, but it uses everyday items that you will find already tucked away in your kitchen cabinets.
In a few short minutes, you can create giant fog-filled bubbles that are just as exciting to watch inflate as they are to watch pop. (And the best part? Since this activity just uses soap and water, there is no reason to worry about potential stains or messy cleanup!)
Don’t take our word for it – try this activity out for yourself! Follow the directions or watch the video tutorial below!
What You Need to Make Dry Ice Fog Puffs:
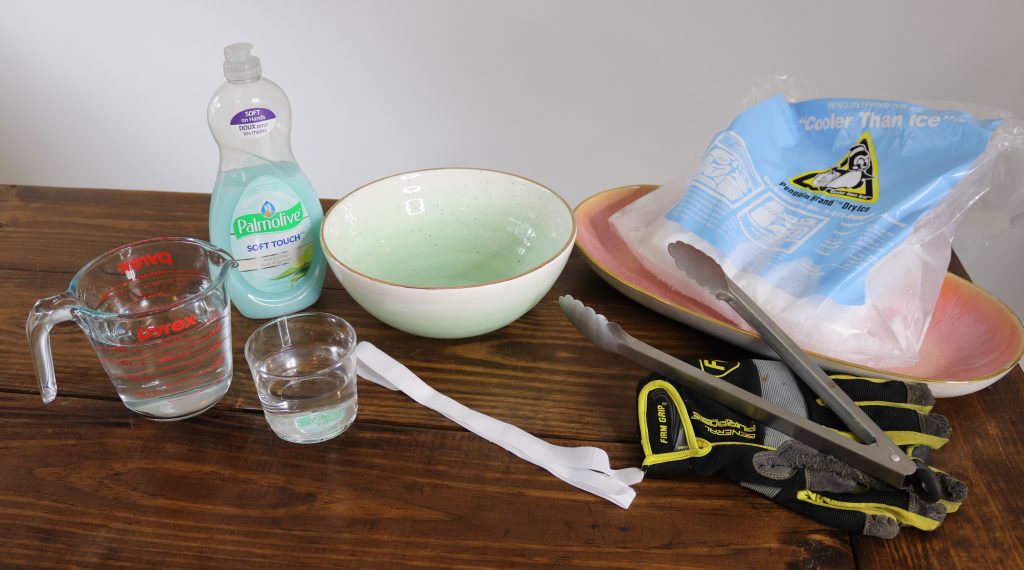
- One strip of fabric or cloth, slightly longer than the diameter of the bowl
- One cup of warm water
- Dish soap
- Medium-sized bowl
- Spoon or stirrer
- More warm water
- Tongs
- Protective gloves
- Dry ice (cubed)
Step 1: Squeeze a dollop (approximately a teaspoon) of dish soap into one cup of warm water. Gently stir until thoroughly mixed.
Step 2: Soak the strip of fabric in the warm water and soap mixture.
Step 3: Fill the medium-sized bowl at least halfway with pure warm water. Make sure the water you are pouring into the bowl does not have any soap in it to ensure your activity will work properly!
Step 4: Using tongs, carefully place a few dry ice cubes into your bowl of warm water. Do not pick up the dry ice with your bare hands! Once the dry ice is in the water, you will notice fog beginning to circulate around the top of the bowl.
SAFETY NOTE: To cube your dry ice from a block, wear protective gloves and eyewear, place the dry ice block in a towel, and carefully hit the block with a hammer or mallet. Do not chip at dry ice with a knife or other sharp object.
Step 5: Remove your piece of fabric from the cup of soapy water, making sure it remains damp and soapy. Press the ribbon along the edges of the bowl to leave a layer of soap and water.
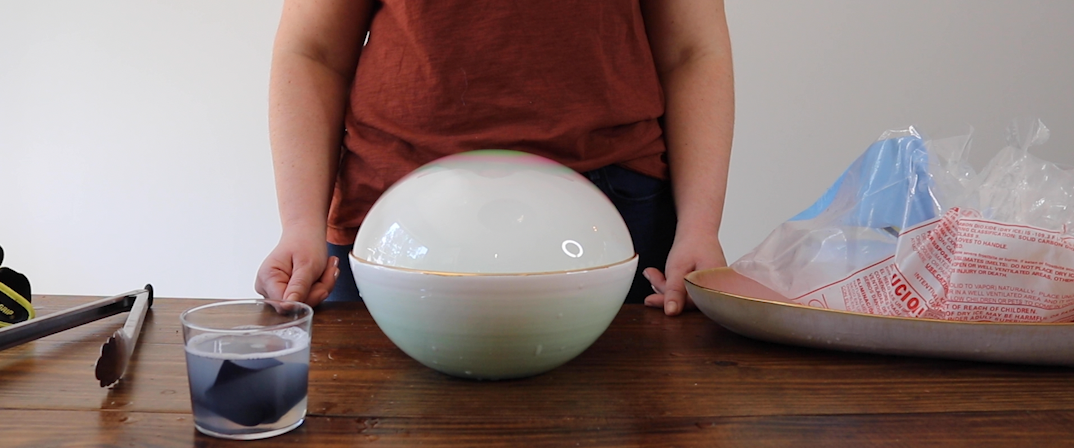
Step 6: Holding the ribbon firmly on each end, pull the ribbon to full length and gently slide it along the top of the bowl. Make sure you are holding the ribbon taut and are keeping contact with the bowl the entire time.
Tip: If the ribbon has lost liquid, a bubble will not form. Dip the fabric in your soapy mixture and try again!
Step 7: When the fog disappears, you will know the bubble has formed successfully. Sit back, relax, and watch it grow!
Safety Notes:
Parental supervision is required.
Do not aim the cup at any humans or animals.
Always use gloves and tongs when handling dry ice.
Did you try this experiment? Let us know how it went by sharing on our social channels.
Instagram: @penguindryice
Facebook: @dryiceideas
Pinterest: Penguin Brand Dry Ice®
Twitter: @PenguinDryIce