
Learning in the Classroom with Dry Ice
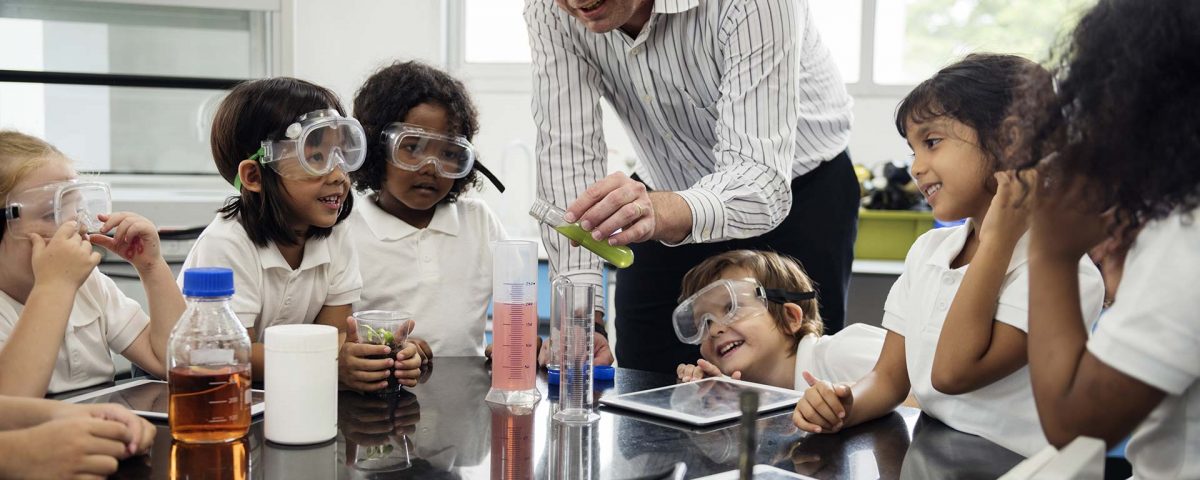
Penguin Brand Dry Ice® can be the perfect ingredient to use in your classroom to create a fun, engaging environment for kids to learn about pH levels, cloud formations and more. Check out the examples below and let us know how much your students loved them! Use our store locator to find the closest grocery store where you can purchase Penguin Brand Dry Ice.
Under adult supervision, all of these demonstrations are appropriate for students from preschool age and up. As long as proper safety precautions are taken with regard to the dry ice, these activities are safe and can be adapted for any kind of classroom setting. We recommend using tongs, towels, or gloves to handle dry ice, and keep it a safe distance from small children during your experiments. Learn more about safe handling instructions for dry ice.
Introduction to Dry Ice, Sublimation and Changing States of Matter
Dry Ice vs. Wet Ice
Supplies Needed:
- 2 plastic bowls
- 2-oz. of Penguin Brand Dry Ice
- 2 ice cubes
- Kitchen scale
Directions:
- Place the dry ice in one bowl and the ice cubes in another bowl
- Observe as the dry ice sublimes (turns from a solid to a gas) while the ice cube melts (turns from a solid to a liquid)
Once all of the dry ice sublimes there will be nothing left in the bowl, but once all of the ice cubes melt there will be water in the bowl.
Dry Ice Vapor
Supplies Needed:
- Two clear 2-liter beakers
- 8 cups warm water
- 8 cups vegetable oil
- 2 pieces of Penguin Brand Dry Ice, about 4-oz. each
Directions:
- Fill one beaker with warm water and the other with vegetable oil
- Place one piece of dry ice into each beaker
Notice how the dry ice in water creates a large amount of vapor while the dry ice in oil doesn’t create any. This is because when dry ice is added to water it combines with the water to create fog (carbon dioxide and water vapor). The dry ice in oil simply sublimes into the atmosphere.
Cloud in a Bag
Supplies Needed:
- A one-gallon pitcher that you can see through
- 3 quarts. warm water
- ½-lb. dry ice
- A one-gallon-sized resealable bag
Directions for creating a dry ice “cloud”:
- Fill the pitcher about three-quarters full of warm water
- Place a piece of dry ice into the water
- Watch as a cloud forms in the pitcher
Putting the cloud in a bag:
- Open a plastic bag and carefully dump the dry ice cloud inside
- Quickly seal it closed to keep the cloud inside the bag
Your cloud in a bag will last for a few moments before the water evaporates and the cloud disperses.
Bubble Volcano
Supplies Needed:
- A 5-liter clear Erlenmeyer flask
- 3 liters warm water
- ½-lb. Penguin Brand Dry Ice
- 1-tsp. liquid dish soap
- Food coloring (optional)
- Bowl to catch the overflow
- Towels
Directions:
- Fill the Erlenmeyer flask about halfway full of warm water
- Place a piece of dry ice into the water
- Squeeze two drops of food coloring into the water to make your “lava” colorful
- Squeeze a small amount of liquid dish soap into the container
- Watch as the solution erupts with bubbles
The “lava” created by the mixture of water, dry ice and dish soap is made from carbon dioxide gas.
Density and Solubility
Make a Lava Lamp
Supplies Needed:
- A 2-liter clear beaker
- 4 cups water
- 4 drops of food coloring
- 4 cups vegetable oil
- Very small sliver of Penguin Brand Dry Ice
Directions:
- Fill the beaker about halfway full with warm water
- Mix a few drops of food coloring into the water
- Add 2 cups of vegetable oil to the beaker
- Drop dry ice into the beaker and watch the bubbles float up through the oil layer and pop on the surface
When you added the oil to the beaker, did you notice how oil and water do not mix and how the oil floats on top? The bubbles that formed after the dry ice was added to the beaker are made up of water vapor and carbon dioxide.
How Dry Ice Acidifies Water
Red Cabbage pH Experiment with Dry Ice
Please note that carbonic acid is not dangerous if handled properly. In this experiment we are essentially making seltzer water (carbonated water). Weak acids such as carbonic acid, citric acid, ascorbic acid and acetic acid are found in many foods we commonly eat and drink and are not harmful if handled properly.
Supplies Needed:
- Four, 1,000 mL Erlenmeyer flasks
- 6 cups filtered water
- 2 tbsp. baking soda
- ¼-lb. Penguin Brand Dry Ice
- 2 cups vinegar
- 2 cups red cabbage juice (boiled red cabbage that has been strained)
Directions:
- Fill three flasks halfway with water
- Add 2 tablespoons of baking soda to one flask and a piece of dry ice to another flask (Leave one flask with just water in it as the control)
- Add 2 cups of vinegar to the fourth flask
- Arrange the flasks from basic to most acidic: baking soda solution, plain water, dry ice, vinegar
- Pour ½ cup of red cabbage juice into each flask
- The baking soda solution will be blue, the neutral flask will be purple, the dry ice and water flask will be purplish pink, and the vinegar flask will be bright pink
Red cabbage contains a compound called anthocyanin that turns different colors depending on its environment. It is a great pH indicator. Dry ice carbonates water, creating carbonic acid. This has a pH between neutral water and vinegar, which can be seen from its color.
The Relationship Between Temperature and Pressure
Invert a Balloon into a Bottle
Supplies Needed:
- A 1,000 mL Erlenmeyer flask
- A 1,000 mL warm water
- A party balloon
- An empty bowl
- Bowl full of water and Penguin Brand Dry Ice
Directions:
- Fill the flask with warm water
- Dump out the warm water into an empty bowl and promptly stretch a balloon over the mouth of the flask
- Place the flask in the bowl with dry ice to cool it down
- Watch as the balloon slowly gets sucked into the bottle and expands inside of it
As the temperature decreases inside the bottle, so does the pressure. This creates a vacuum, making the balloon invert and expand inside of the bottle.
Collapse a Plastic Bottle
Supplies Needed:
- 2-liter plastic bottle with a lid
- 2 liters of warm water
- An empty bowl
- Bowl with Penguin Brand Dry Ice
Directions:
- Fill the plastic bottle with warm water
- Dump out the warm water into the empty bowl and quickly screw on the cap
- Place the bottle in the bowl with dry ice to cool it down
- Watch as the bottle collapses and folds into itself
As the temperature falls inside the bottle, so does the pressure. This creates a vacuum, crushing the bottle from the outside in.